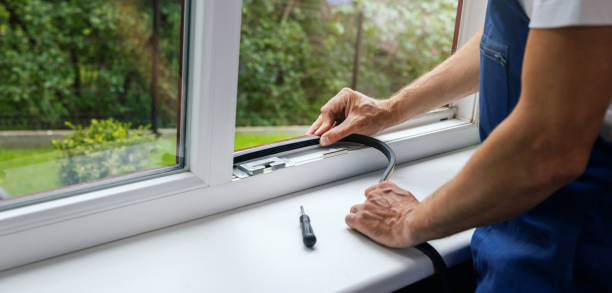
Exploring the Advantages of Professional Installation for Windows Rockville, MD
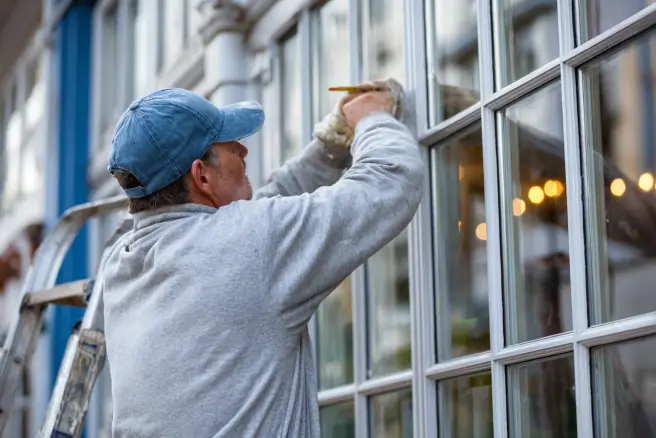
When it comes to installing or replacing windows in your home, hiring a professional for the job offers several advantages. While some homeowners may consider taking on the task themselves, professional window installation ensures quality, efficiency, and peace of mind. Below are key benefits to keep in mind.
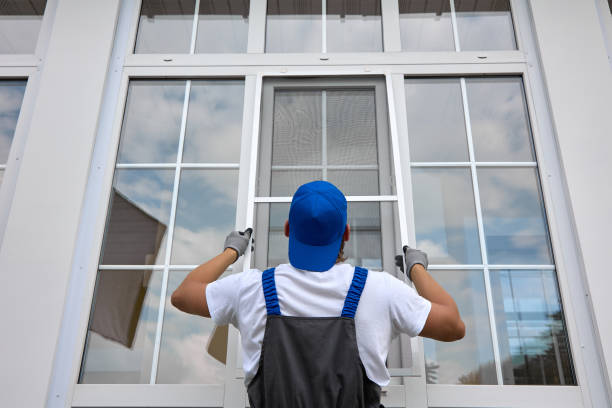
Professional Window Installation in Rockville, MD with Expertise and Precision
Professionals bring years of experience and technical knowledge to the table, which is critical for ensuring that windows are installed correctly.
– Air leaks
– Water damage
– Poor energy efficiency
Hiring a skilled contractor reduces the risk of these issues since they understand the intricacies of fitting windows securely and accurately into various types of structures.
Upgrade Your Home with Replacement Windows Rockville, MD for Better Energy Efficiency
Windows play a significant role in regulating indoor temperatures. Improperly installed windows often allow drafts or heat transfer, leading to higher energy bills and less comfort.
– Seal gaps effectively to prevent air leakage
– Use proper insulation techniques around window frames
– Ensure that all manufacturer guidelines for energy-efficient installation are met
This attention to detail ensures that your home stays comfortable while minimizing energy consumption.
Long-Term Cost Savings with Window Repair Rockville, MD
While paying for professional installation might seem like a significant upfront cost, it is an investment with long-term benefits. DIY mistakes can lead to costly repairs or replacements down the line, whereas professionals get it right the first time.
– Properly sealed windows prevent water damage that could require expensive structural fixes
By avoiding these pitfalls, you save money over time while enjoying better functionality and longevity from your new windows.
Access High-Quality Window Glass Replacement Rockville, MD
One often-overlooked benefit is access to premium materials through professional installers. Many contractors have relationships with trusted manufacturers and suppliers, ensuring you get high-quality products at competitive prices. Additionally, professionals know which materials work best for your specific climate and home design needs.
| DIY Installation | Professional Installation |
| Risk of improper fit | Precision-based measurements |
| Limited access to materials | Premium-grade options available |
| Potential air/water leaks | Guaranteed weatherproofing |
Warranty Protection
Most professional window installations come with warranties on both labor and materials, offering added protection against future problems. In contrast, DIY projects rarely include such guarantees, leaving you solely responsible if issues arise later.
Saved Time and Reduced Stress
Window installation is a complex process that can be time-consuming for someone without proper training or tools. Professionals streamline this process using advanced equipment and established workflows, so you don’t have to worry about delays or subpar results.
Final Thoughts on Choosing Professionals
Nova Exteriors Inc. Rockville
+13013967509
https://www.novaexteriors.com/rockville-windows
Investing in professional window installation gives homeowners confidence in their home’s safety, comfort levels, and overall efficiency.
Signs You Need a Window Replacement in Rockville, MD
Windows play a crucial role in the comfort, efficiency, and aesthetics of your home. Over time, they may degrade due to wear and tear or exposure to the elements. Below are some key signs that indicate it might be time for new window installation.
If you notice drafts near your windows even when they are closed, it could mean the seals have deteriorated or there are gaps between the frame and wall. – Uncomfortable indoor temperatures. – Potential moisture infiltration and damage.
Single-pane windows or older double-pane models without proper insulation allow heat transfer, forcing your HVAC system to work harder. Look out for: – Higher-than-usual utility bills. – Difficulty maintaining consistent indoor temperatures.
Switching to modern energy-efficient windows with features like low-E coatings and multi-pane construction can help mitigate these issues.
– Peeling paint caused by prolonged exposure to moisture. – Condensation between glass panes (a sign of broken seals).
Damaged windows not only weaken structural integrity but may also become a safety hazard.
Windows that stick, don’t open smoothly, or won’t stay open on their own are often a sign of underlying problems such as: – Warping caused by excessive humidity. – Broken hardware like latches or hinges. – Improper installation affecting alignment.
This issue can compromise ventilation and home security over time.
Modern multi-pane options offer significant noise reduction benefits while improving insulation.
| Old Windows vs Modern Windows | Impact |
| Single-pane glass | Poor insulation & soundproofing |
| Multi-pane with gas fills | Better thermal performance & reduced noise |
Moisture infiltration is a major red flag indicating it’s time for replacement. Signs include: – Stains on walls near the window frames. – Mold growth due to trapped moisture. – Soft spots in wooden frames signaling rot.
Ignoring water damage can lead to more extensive repairs down the line.
Though functionality should always come first, aesthetics matter too—especially if you’re planning to sell your home in the future. Outdated styles can detract from curb appeal and may not complement modern architecture trends.
Replacing old windows with sleek designs such as frameless models or black-trimmed frames can immediately elevate your home’s overall appearance while providing better performance features.
Identifying these warning signs early not only improves comfort but also helps avoid costlier repairs later on. Addressing aging or inefficient windows promptly ensures a safer and more energy-efficient living space for years to come.
Windows play a crucial role in the overall comfort, functionality, and efficiency of your home. Over time, however, they can show signs of wear and tear that may impact their performance. Below are some of the most common indicators that suggest it might be time to replace your windows.
If you’ve noticed a steady increase in your utility bills without significant changes in your energy usage, inefficient windows may be at fault. Older or poorly installed windows often allow drafts and air leaks, forcing your heating or cooling systems to work harder to maintain indoor temperatures. This energy loss can result in significantly higher monthly costs.
Look out for: – Drafts near windows during cold or windy days. – Difficulty maintaining consistent indoor temperatures. – Condensation forming between panes of double- or triple-pane windows.
Physical damage to your windows is often one of the most obvious signs they need replacing. Cracks, warping, rotting frames, and water damage can compromise both their functionality and appearance.
Common forms of physical window damage include: – Warped or cracked frames. – Broken glass panes. – Rotting wood due to prolonged exposure to moisture.
Damaged windows not only detract from the beauty of your home but can also pose safety risks.
Windows should open and close smoothly without excessive effort. If you’re struggling with stuck sashes or poorly functioning mechanisms, it could be due to age-related deterioration or improper installation.
Potential causes include: – Warping from moisture exposure. – Rusted or corroded hardware. – Improper alignment resulting from frame shifts over time.
Windows that don’t operate correctly may also hinder emergency exits during critical situations.
If you’re hearing too much outdoor noise inside your home—whether it’s traffic, barking dogs, or other disturbances—it could indicate poor insulation properties in your current windows. Modern replacement windows often feature improved soundproofing technology that helps create a quieter indoor environment.
Comparison Table: Old vs Modern Windows Soundproofing
| Feature | Older Windows | Modern Replacement Windows |
| Glass Type | Single-pane | Double/triple-pane with gas fill |
| Frame Material | Basic wood/aluminum | Insulated vinyl/composite |
| Sealing Quality | Minimal | Advanced airtight seals |
If condensation forms between layers of glass on double- or triple-pane windows, this is often a sign that the seal has failed. When seals break down over time, moisture can enter between the panes and reduce the insulating capabilities of the window.
Key issues caused by failed seals: – Reduced energy efficiency due to lost gas fillers (like argon). – Foggy glass panels impairing visibility. – Higher likelihood of further damage due to trapped moisture.
Aesthetic appeal matters when it comes to enhancing curb appeal and property value. If your current windows look outdated or clash with modern design trends, upgrading them can provide a refreshed appearance while boosting functionality.
Consider replacing if: – Frames are faded or discolored beyond repair. – Styles don’t complement recent renovations.
Modern replacement options allow homeowners flexibility with materials such as vinyl, fiberglass, wood-clad finishes—creating opportunities for better customization and style updates that align with personal preferences.
Recognizing these warning signs ensures timely action is taken before minor problems escalate into costly repairs down the line while improving overall living conditions for homeowners seeking long-term durability and performance from their new installations.
How Proper Window Installation Can Improve Energy Efficiency in Your Home
Proper window installation plays a critical role in enhancing the energy efficiency of your home. While it may seem like a minor detail, poorly installed windows can contribute significantly to energy loss, leading to increased utility bills and an uncomfortable indoor environment. Here’s how professional installation can make a difference.
The Link Between Windows and Energy Efficiency
Windows are one of the primary points where energy is lost in many homes. Drafts, air leaks, and poor insulation around window frames can allow heated or cooled air to escape.
- Creating a tight seal to prevent air leakage.
- Reducing heat transfer through advanced weatherproofing techniques.
- Ensuring that insulation around the frame is correctly applied.
Benefits of Proper Window Installation for Energy Efficiency
- Improved Insulation
Professionally installed windows help maintain consistent indoor temperatures by minimizing thermal exchange between the interior and exterior environments. - Elimination of Drafts
Gaps around improperly installed window frames allow drafts to enter. A precise installation ensures there are no spaces for air leaks. - Enhanced Compatibility with Energy-Efficient Features
Modern windows often feature energy-saving technologies such as low-E coatings or double-pane glass with gas fills (e. g. , argon). These features only perform optimally when the window is installed correctly. - Lower Monthly Utility Costs
With less reliance on heating or cooling systems due to reduced energy loss, homeowners can expect noticeable savings on their energy bills over time.
Common Signs of Inefficient Window Installation
Even high-quality windows won’t perform well if they’re improperly installed.
| Symptom | Possible Cause |
| Drafts near windows | Poor sealing or gaps during install |
| Condensation buildup | Inadequate insulation |
| Increased energy bills | Air leakage or inefficient thermal barrier |
If you notice any of these issues, it might be time to have a professional inspect your current installation or consider replacing outdated windows entirely.
Key Factors That Ensure Proper Installation
- Hire Skilled Professionals: Experts ensure precise measurements and proper alignment during installation.
- Use High-Quality Materials: Opt for weather-resistant caulking and foam insulation designed for long-term performance.
- Inspect Before Sealing: Ensure there’s no damage or misalignment before finalizing the process.
- Focus on Weatherproofing: Verify that all seams are sealed effectively to block out moisture and drafts.
By prioritizing proper window installation, homeowners can take an important step toward creating a more comfortable living space while reducing their environmental footprint and lowering annual utility costs.
Top Tips to Ensure a Seamless and Stress-Free Window Replacement Process
Replacing your windows can be a significant investment, but with thoughtful preparation and planning, you can ensure the process goes smoothly. Here are some practical tips to help guide you through a stress-free window replacement journey.
The foundation of a successful window replacement project lies in hiring an experienced and reputable contractor.
– Do Your Research: Look for licensed and insured professionals with extensive experience in window installation.
– Read Reviews: Check online reviews or ask for references from past clients to assess their quality of work.
– Get Multiple Quotes: Compare quotes from at least three contractors to balance cost and expertise effectively.
| Material | Pros | Cons | |——————|—————————————————|—————————–| | Vinyl | Affordable, low maintenance, energy efficient | Limited color choices | | Wood | Aesthetic appeal, customizable | High maintenance, expensive | | Aluminum | Durable, sleek design | Poor insulation | | Fiberglass | Durable, energy efficient | Higher initial cost |
Consider your home’s architectural style and climate when making your choice.
Timing is crucial for minimizing disruptions during installation: – Seasonal Considerations: Spring or early fall often provide optimal weather conditions for installation.Plan Ahead: Schedule your replacement well in advance since contractors often book up during peak seasons.Be Prepared for Delays: Supply chain issues or unexpected weather changes could impact timelines.
To make the process easier for both you and your contractor: – Remove curtains, blinds, or any window treatments. – Clear furniture or obstacles near windows being replaced. – Secure fragile items around the workspace.
Proper preparation saves time and ensures smoother access for installers.
Upgrading windows is an excellent opportunity to improve energy efficiency in your home: – Look for ENERGY STAR-rated windows tailored to your climate zone. – Consider double- or triple-pane glass options with low-emissivity (Low-E) coatings.
Energy-efficient windows not only reduce utility costs but also enhance comfort year-round.
Clear communication helps avoid missteps during installation: – Confirm project details like timelines and material selections upfront. – Ask questions about warranties on both materials and labor.
Keeping open dialogue ensures you’re aligned on expectations throughout the process.
Once installation is complete: 1. Check that all windows open/close properly without sticking. 2. Inspect caulking around frames for airtight seals. 3. Confirm cleanup has been handled appropriately by the contractor.
It’s important to address any concerns before signing off on the project.
By following these tips, you can streamline your window replacement project while mitigating common challenges that could arise during installation.
- Exploring the Advantages of Professional Installation for Windows Rockville, MD
- A Comprehensive Guide to Choosing New Construction or Replacement Windows in Rockville, MD
- Efficient Tips for Window Replacement Rockville, MD Homeowners Should Know
- What to Expect During a Window Installation in Rockville, MD
- Expert Tips for DIY Installation of Windows Rockville, MD Homeowners Will Love
- Preparing for Window Replacement Rockville, MD: Tips for a Smooth Installation Process
A Comprehensive Guide to Choosing New Construction or Replacement Windows in Rockville, MD
New construction windows are designed for homes where the window framing is being built from scratch. This option is typically used in new builds, home additions, or major renovations when addressing structural elements.
Nailing Flange: They come with a nailing flange, which attaches directly to the home’s studs.Framing Installation: These windows require the complete removal of existing window frames if retrofitted into an older home.Structural Work: Often necessitates more extensive labor and may involve siding removal.
- Building a new home or adding on to an existing structure.
- Replacing severely damaged window frames due to rot or structural issues.
- Planning a large-scale remodeling project where walls will already be opened up.
What Are Replacement Windows?
Replacement windows are specifically designed for existing structures. These are installed into pre-existing window openings without disturbing surrounding walls or framing.
Key characteristics of replacement windows include: – No Nailing Flange: They fit directly into the old frame using brackets or fasteners.Minimal Invasive Work: Less disruption to exterior siding and interior walls.Quick Installation: Typically easier and faster to install compared to new construction options.
- Updating old, drafty, or inefficient windows without altering the frame structure.
- Preserving existing interior and exterior finishes.
- A more cost-effective option for homes not requiring extensive structural repairs.
| Feature | New Construction Windows | Replacement Windows |
| Ideal Use Case | New builds/major renovations | Existing window upgrades |
| Installation Complexity | More extensive | Relatively simple |
| Costs | Higher (includes framing work) | Lower (less labor-intensive) |
| Structural Changes | Requires significant changes | Minimal modifications needed |
If your current window frames are in good condition, replacement windows may suffice. However, rotting wood frames often require new construction options.- Replacement windows tend to be less expensive upfront because they involve less structural work. However, consider long-term energy savings when selecting high-efficiency products.
- If you’re considering major renovations down the road that could impact framing or siding, it might be worth timing those changes with a switch to new construction units.
By evaluating your home’s needs and weighing these key differences, you’ll be better equipped to choose between new construction and replacement windows while staying aligned with your goals and budget.
Exploring Window Installation in Rockville, MD for New Construction Homes
Key Features of New Construction Windows:
– Nail Fin Installation:Ensures a strong, weatherproof seal during installation.
– Comprehensive Fit:Ideal for situations where walls will be rebuilt or reframed.
– Customizable Sizes:Suitable for creating new window openings or expanding existing ones.
When to Choose New Construction Windows:
1. Building a new home from scratch.
2. Undertaking extensive renovations that involve removing siding or exposing wall studs.
3. Addressing structural issues, such as wood rot around existing windows.
A Comprehensive Guide to Replacement Windows Rockville, MD
They’re often preferred in residential projects where homeowners want to upgrade their windows with minimal disruption.
Key Features of Replacement Windows:
– No Nail Fin Required:Faster Installation Process:Typically takes less time since no major structural changes are needed.Versatility in Styles and Materials:Wide range of designs available for aesthetic and functional upgrades.
When to Choose Replacement Windows:
1. Upgrading old, inefficient glass panes with modern energy-efficient materials like double-pane or low-E coated glass. 2. Preserving interior and exterior finishes such as trim, siding, or paintwork. 3. Needing a cost-effective solution for improving your home’s comfort without undertaking large renovations.
Understanding Window Repair in Rockville, MD: New Construction vs Replacement Options
| Feature | New Construction Windows | Replacement Windows |
| Installation Process | Requires opening up walls | Fits into current openings |
| Cost | Typically higher due to labor involved | More budget-friendly |
| Application | Best for new builds/major renovations | Ideal for upgrading existing homes |
| Customization Options | Easily adaptable during construction | Limited by current window sizes |
Key Factors to Consider for Window Glass Replacement Rockville, MD
- Your Home’s Condition:If there’s no damage around your current frames and you’re not altering wall structures, replacement windows might be sufficient.
- Budget Constraints:Replacement windows are generally more affordable due to lower labor costs.
- Desired Aesthetic Changes:If you’re looking to change window sizes or styles significantly (e. g. , adding bay or picture-style options), new construction may be required.
- Energy Efficiency Goals:Both types can improve energy efficiency if paired with modern glazing technologies; however, proper installation is crucial regardless of your choice.
By understanding these two categories along with their key differences, homeowners can confidently select the option that aligns with their renovation needs while enhancing their property’s value and functionality.
Deciding on the best time to purchase and install replacement windows can feel overwhelming, particularly when factoring in seasonal changes, market trends, and your personal schedule. However, understanding key considerations can help you make a well-informed decision. Below, we break down timing factors that could impact your window replacement project.
The Seasonal Impact on Window Installation
- Spring and Summer:
These are peak seasons for window installations due to moderate weather conditions. Installers typically have more flexibility to work uninterrupted by harsh elements like rain or snow. However, demand is higher during these months, which may lead to increased pricing or longer wait times for scheduling. - Fall:
Early fall is an ideal window replacement period due to cooler temperatures and lower humidity levels. It’s often easier for contractors to seal windows properly in these conditions. Additionally, since this season comes right before winter, replacing old or drafty windows at this time can help reduce heating costs. - Winter:
While installation during the colder months may seem daunting, it often has advantages such as off-season discounts from contractors looking to fill their schedules. However, harsh weather conditions might complicate the process and extend timelines.
Market Trends That Influence Window Pricing
The timing of your purchase isn’t just about seasons—it’s also about market factors that affect pricing.
- End-of-Year Discounts: Manufacturers and retailers sometimes offer promotions at the end of the fiscal year in an effort to clear out inventory.
- Holiday Deals: Major shopping events like Black Friday or end-of-summer sales can provide cost-saving opportunities.
- Off-Peak Installation Periods: Scheduling installations during slower months (typically winter) can result in reduced labor costs since demand is lower.
If budget constraints are a primary concern, monitoring these trends could help you secure better deals on both materials and labor.
Personal Scheduling Considerations
- Home Accessibility: Ensure you’re available or able to coordinate with installers during working hours.
- Special Circumstances: If you’re planning renovations or other home improvement projects simultaneously with the installation process, align timing carefully so tasks don’t overlap.
- Energy Efficiency Goals: If energy savings are your priority—for instance, minimizing heat loss in winter—plan replacements accordingly.
Seasonal Comparison Table
| Season | Pros | Cons |
| Spring | Comfortable temperatures; flexible sealing | High demand; potential long wait times |
| Summer | Ideal working conditions | Higher competition; potentially higher prices |
| Fall | Cooler temps for effective sealing; pre-winter prep | Limited availability as winter nears |
| Winter | Off-season discounts; quicker scheduling | Weather delays; challenges with cold sealing |
By understanding how different factors affect the timing of your purchase and installation process—seasonal conditions, market trends, personal preferences—you’ll be better equipped to make decisions that align with your goals while maximizing efficiency and savings.
Clear the Area Around Your Windows
To provide easy access to the windows and prevent accidental damage:
– Remove furniture: Move couches, tables, and other large pieces of furniture away from windows being replaced.
– Take down curtains, blinds, and hardware: Detach all window treatments, including rods, shades, or shutters.
– Clear nearby decor: Remove wall hangings or picture frames near the windows to avoid them getting knocked over during work.
Protect Your Floors and Furniture
Window installation can involve dust and debris.
– Place protective coverings, such as drop cloths or plastic sheeting, on floors near the work areas.
– Use old sheets or tarps to cover any furniture that cannot be moved out of the way.
– If possible, designate a clear path for installers to move equipment in and out while minimizing mess in other parts of your house.
Ensure Easy Outdoor Access
The exterior side of your windows also requires preparation for seamless installation:
– Trim overgrown landscaping around windows to allow space for ladders or scaffolding equipment.
– Move outdoor furniture, potted plants, or garden tools that might obstruct access to windows.
– Unlock gates or fences ahead of time so installers don’t face delays entering your yard.
Secure Fragile Items Inside Your Home
Vibrations caused by removal tools can sometimes disrupt items inside the home:
– Temporarily relocate fragile items such as glassware or porcelain displays from shelves near work areas.
– Secure loose objects that could fall due to vibrations during window replacement activities.
Communicate with Installers Before Their Arrival
To ensure everyone is on the same page before the project begins: 1. Confirm start times and expected duration with your contractor. 2. Let installers know if there are any specific instructions regarding access points (e. g. , garage doors) or special considerations like pets. 3. Ask if they will be bringing their own protective coverings; this will help you determine whether additional measures are necessary on your part.
Take Safety Precautions for Children and Pets
For households with young children or pets: – Keep them in a safe space away from construction zones during working hours. – Explain any temporary changes (such as blocked off areas) in advance so that everyone stays safe.
| Preparation Task | Indoor Focus | Outdoor Focus | Notes |
| Clear Window Area | Move furniture & remove decor | Trim landscaping | Essential for installer access |
| Protect Surfaces | Cover floors & immovable furniture | N/A | Reduces post-installation cleanup |
| Secure Fragile Items | Relocate valuables & glass items | N/A | Prevents damage from vibrations |
| Communicate With Team | Share schedule & unique needs | Provide gate/yard instructions | Avoids delays and miscommunication |
Properly preparing your home ensures not only an efficient window replacement process but also minimizes disruptions to your daily routine while keeping both installers and belongings safe throughout the renovation project.
Below is a step-by-step guide to help you get ready for a successful window replacement.
Clear the Area Around the Windows
One of the most important steps in preparing your home is to ensure that access to your windows is unobstructed, both inside and outside.
- Remove Furniture:Move sofas, tables, or any bulky furniture away from the windows being replaced. Leave at least 3-4 feet of space around each window for easy access.
- Take Down Curtains, Blinds, and Shades:Remove all window treatments, including rods or hardware mounted above or around the frames.
- Clear Windowsills:Take away plants, photo frames, or decorative items from the windowsills to prevent them from being damaged during installation.
Protect Your Floors and Furniture
Window replacement can generate dust and debris. Taking measures to protect your belongings will save you from additional cleanup later.
- Use Floor Coverings:Lay down drop cloths or plastic sheets across floors near installation areas to catch debris and shield surfaces from damage during the process.
- Cover Furniture:If moving furniture isn’t an option in certain rooms, cover nearby pieces with protective sheets or old blankets.
Secure Outdoor Areas Around Windows
The exterior area surrounding your windows also needs to be addressed before installation day.
- Trim Landscaping:Ensure bushes, shrubs, or tree branches are not obstructing access to exterior window areas by trimming them back beforehand.
- Relocate Outdoor Equipment:Move items such as grills, patio furniture, garden tools, or toys away from windows where installers may need space to work.
| Exterior Preparation Checklist | Status |
| Shrubs and trees trimmed | ☐ |
| Patio furniture relocated | ☐ |
| Driveway cleared for installer parking | ☐ |
Create a Safe Work Environment
Safety should be prioritized for both installers and household members during the project.
- Keep Pets and Children Out of Work Areas:For safety reasons, ensure pets and young children are kept away from rooms where installation is taking place.
- Turn Off Security Systems:If you have alarms connected to windows being replaced, deactivate them temporarily so installers can complete their work without triggering false alarms.
Communicate With Your Installers
Effective communication with your window installation team ensures smooth coordination throughout the project timeline.
- Provide clear instructions about preferred entry points into your home.
- Ask if there are any specific preparations they recommend based on their process.
- Confirm their arrival time so you can adjust your schedule accordingly.
By following these steps carefully, you’ll create an organized environment that allows installers to focus on their work while reducing potential inconvenience for everyone involved in this important home improvement project.
- Exploring the Advantages of Professional Installation for Windows Rockville, MD
- A Comprehensive Guide to Choosing New Construction or Replacement Windows in Rockville, MD
- Efficient Tips for Window Replacement Rockville, MD Homeowners Should Know
- What to Expect During a Window Installation in Rockville, MD
- Expert Tips for DIY Installation of Windows Rockville, MD Homeowners Will Love
- Preparing for Window Replacement Rockville, MD: Tips for a Smooth Installation Process
Efficient Tips for Window Replacement Rockville, MD Homeowners Should Know
Replacing window glass can seem like a daunting task, but with the right approach and preparation, it can be done quickly and efficiently. Whether you’re tackling a cracked pane or completely shattered glass, following these steps will ensure the process is smooth and effective.
Assess the Damage
- The extent of damage: Is it a small crack or completely broken?
- Type of glass: Does the window use standard annealed glass, tempered glass, or specialty materials?
- Frame condition: Ensure that the frame is intact and not warped or damaged.
Based on your assessment, decide if replacing just the glass is sufficient or if additional repairs are needed.
Steps for Replacing Window Glass
- Gather Your Tools
Ensure you have all necessary tools ready before you begin. These might include: - Safety gloves
- Safety goggles
- Putty knife
- Utility knife
- Measuring tape
- Hammer and small nails
- Remove Broken Glass
Safely remove any remaining shards of broken glass. Wear protective gloves during this step to avoid injury. - Clean and Prepare the Frame
Once all remnants are removed from the old installation
Step-by-Step Guide to Window Installation in Rockville, MD
Replacing a broken windowpane might seem like a daunting task, but with the right approach and preparation, it can be done efficiently. Follow these step-by-step instructions to ensure a smooth and safe process.
Step 1: Assess the Damage and Prepare Your Workspace
Before beginning, evaluate the extent of the damage. Determine if only the glass needs replacement or if parts of the frame are also damaged. Then, prepare your workspace:
– Clear any furniture or obstacles near the window.
– Lay down a drop cloth or tarp to catch falling debris and protect your floors.
– Wear safety gear, including gloves and eye protection.
Step 2: Remove Broken Glass Safely
Removing broken glass is one of the most critical steps to prevent injury. Here’s how to do it:
1. Remove loose shards: Carefully remove large pieces of glass by hand using thick gloves. Avoid grabbing sharp edges directly. 2. Use pliers: For stubborn shards stuck in the frame, use needle-nose pliers to gently extract them. 3. Dispose properly: Place all broken glass in a sturdy container labeled as “glass waste.” Do not mix it with regular trash.
Step 3: Clean Out the Window Frame
Once all glass shards are removed:
– Scrape away old putty or adhesive: Use a putty knife to remove any dried adhesive or residue from the frame. – Check for irregularities: Inspect for cracks, splinters, or damage within the window frame that may impede proper installation. – Sand rough areas: Smooth out uneven surfaces using sandpaper for better adhesion when installing new panes.
Step 4: Measure and Cut New Glass
Accurate measurements are key to ensuring your new pane fits snugly into place:
– Use a tape measure to record both the height and width of the window opening. – Subtract around 1/16 inch from both dimensions for expansion allowance. – If cutting yourself, use a high-quality glass cutter on sturdy flat surfaces for precision cuts. Alternatively, have it cut professionally.
| Measurement | Action | Notes |
| Height | Measure top-to-bottom | Subtract 1/16 inch |
| Width | Measure side-to-side | Subtract 1/16 inch |
Step 5: Install New Glass Pane
Once your new pane is ready:
1. Apply glazing compound or putty along the edges of the cleaned frame. 2. Position the pane carefully into place while ensuring even pressure across all sides. 3. Secure with glazier points (small triangular clips) every few inches around its perimeter for additional stability.
Step 6: Final Touches
To finish up:
– Smooth excess putty using a putty knife at an angled motion for clean lines around edges. – Allow at least 24–48 hours for everything to set before painting or applying finishing touches.
Replacing a windowpane requires patience but remains manageable with these straightforward steps tailored towards efficiency—ensuring both safety improvements indoors alongside restored aesthetics externally without complications during execution stages thereof such projects over time!
Step-by-Step Guide to Replacement Windows Rockville, MD Homeowners Trust
Replacing a broken windowpane is an essential home repair skill that can save you both time and money. By following a systematic approach, you can ensure the process is efficient, safe, and results in a well-installed replacement. Below is a detailed guide to help you replace a broken windowpane step by step.
1. Assess the Damage
- The entire pane needs replacing or if only part of it is damaged.
- The existing frame is in good condition or requires repairs.
This initial assessment will help you decide on the materials and tools you’ll need.
2. Gather Tools and Materials
Tools: – Safety gloves – Protective eyewear – Utility knife – Putty knife or chisel – Hammer (optional) – Measuring tape
Materials: – Replacement glass pane (pre-cut to size)
– Glazier’s points
– Window putty or glazing compound
– Paint (optional, for touch-ups)
3. Remove Broken Glass Safely
Safety should be your top priority when handling broken glass.
- Wear Protective Gear: Put on safety gloves and goggles to prevent injury.
- Remove Loose Pieces: Carefully dislodge any loose shards from the frame using gloved hands or pliers.
- Use Tape for Smaller Fragments: Apply masking tape over remaining smaller pieces to keep them intact as they are removed.
- Dispose Properly: Place all glass pieces in a sturdy container designated for sharp materials.
4. Prepare the Frame
Proper preparation of the window frame ensures a snug fit for your new glass pane.
- Use a putty knife or scraper to remove old putty or glazing compound from around the edges of the frame.
- Remove any remaining glazier’s points using pliers.
- Sand down rough areas within the frame to create an even surface.
- Clean debris thoroughly with a damp cloth to ensure no obstructions remain.
Tip: If parts of your wooden frame are rotten, repair them with wood filler before proceeding.
5. Install the New Glass Pane
Once your frame is clean and prepared, it’s time to install your replacement pane.
- Measure Twice: Confirm that your replacement glass fits properly by measuring it against the frame opening.
- Position Carefully: Place the new pane into position within the frame while ensuring even spacing on all sides.
- Secure with Glazier’s Points: Insert glazier’s points every few inches along the edge of the glass, pressing them gently into place with your putty knife.
6. Apply Window Putty
- Roll glazing compound into long strips approximately ¼-inch thick.
- Press these strips around all edges where glass meets frame.
- Use your putty knife at an angle to smooth out excess compound evenly along each side.
Tip: Allow at least 24 hours for putty to cure before painting or exposing it fully to rain or moisture.
Essential Maintenance Tips for Window Repair Rockville, MD
- Inspect seals regularly for cracks or gaps that could allow air leakage.
- Touch up paint as needed on frames exposed during installation work.
- Clean windows periodically using non-abrasive cleaners suitable for glass surfaces.
By following these steps carefully, you’ll achieve professional-quality results when replacing any broken windowpane independently at home without unnecessary delays or costly mistakes.
Essential Tips for Window Glass Replacement Rockville, MD Homeowners
When undertaking a window installation project, having the right materials on hand is essential to ensure efficiency, safety, and durability. Quality materials will not only make the installation process smoother but also enhance the overall performance and longevity of your windows. Below is a detailed guide on the key materials required for a successful window installation process.
Primary Materials Needed
- Pre-fabricated or custom-made windows (double-hung, casement, sliding, etc.) depending on the size and style of your existing frame or project requirements.
- Ensure that the window glass is energy-efficient (look for Low-E coatings or double-glazing).
- Expanding foam insulation: Used to fill gaps around the frame to prevent air leaks.
- Fiberglass insulation: A reliable option for additional thermal efficiency.
- Flashing tape: Essential for sealing corners and edges to prevent water infiltration.
- Exterior caulk: Choose silicone or polyurethane-based caulks designed for outdoor use.
- Screws or nails: Corrosion-resistant fasteners (e.g., galvanized steel) are ideal for attaching the window securely to the frame.
- Wooden or plastic shims are used to level and align the window before securing it in place.
Additional Supplies
- Sealants
A high-quality sealant is critical for creating an airtight bond between the window frame and surrounding surfaces. It not only keeps out drafts but also prevents moisture damage. - Trim Pieces
Trim pieces like interior casing or exterior cladding provide a polished finish while protecting structural components from exposure to weather elements. - Drip Cap
This metal flashing sits above the window unit to redirect water away from its surface, reducing potential damage over time.
Tools That Complement Key Materials
While materials are indispensable, their proper application depends heavily on tools like utility knives, caulk guns, tape measures, spirit levels, and drills with appropriate bits.
Sample Table of Materials and Their Functions
| Material | Purpose | Example Features |
| Window Unit | Provides light, ventilation & aesthetics | Double-pane with Low-E coating |
| Insulation Foam | Prevents air leakage | Expanding polyurethane formula |
| Flashing Tape | Seals against water infiltration | Waterproof adhesive backing |
| Shims | Aligns & levels windows | Durable plastic or hardwood |
| Caulk | Ensures airtight seals | Silicone-based exterior-grade |
Investing in high-quality materials ensures that your newly installed windows will perform optimally while enhancing energy efficiency and curb appeal. Always double-check measurements before purchasing supplies to avoid unnecessary delays or misfits during installation.
Safely Removing Glass Shards from Damaged Windows Rockville, MD
When dealing with a broken windowpane, safety and precision are paramount. Broken glass poses significant risks, such as injury from sharp edges, so proper techniques should be followed. Below is a comprehensive guide to safely removing glass shards from a damaged windowpane while protecting yourself and preserving the integrity of the frame.
Step 1: Gather Necessary Safety Equipment
- Heavy-duty gloves (preferably cut-resistant)
- Safety goggles or glasses
- Long-sleeved shirt and sturdy pants
- Utility knife or putty knife
- Painter’s tape or duct tape
- Pliers (needle-nose preferred)
- Dustpan and brush or vacuum cleaner with a hose attachment
Step 2: Assess the Damage
Begin by carefully inspecting the damaged windowpane. Determine if any large shards are still intact within the frame. This step allows you to plan your removal process effectively without causing additional damage.
- Check for loose shards that may fall during removal.
- Identify areas where glass is firmly stuck in the frame.
Step 3: Secure Any Remaining Glass Pieces
To prevent loose shards from falling unexpectedly during removal, apply painter’s tape or duct tape across the remaining pieces of glass in an “X” pattern. This will hold them together temporarily until you can remove them safely. For larger sections, add extra strips of tape for added security.
Step 4: Remove Loose Shards First
- Use needle-nose pliers to gently grip and lift each shard out of the frame.
- Place removed shards directly into a thick paper bag or sturdy cardboard box for safe disposal.
- For tiny fragments left on the surface, use a dustpan and brush or vacuum them up carefully.
Pro Tip: Avoid using your hands directly, even with gloves on, as some edges might still penetrate protective material.
Step 5: Address Stubborn Pieces in the Frame
- Use a utility knife or putty knife to loosen edges around the shard.
- Carefully wiggle stubborn pieces free using pliers.
- Avoid applying excessive force that could damage the frame.
If needed, soften old glazing putty with heat (a hairdryer set on low works well) before attempting removal.
Step 6: Clean Up Remaining Debris
- Thoroughly inspect for any smaller fragments hidden within grooves or corners of the frame.
- Vacuum along edges where microscopic splinters may remain.
- Wipe down surfaces using a damp cloth to pick up residual particles.
| Safety Tip | Always double-check that no glass fragments remain before proceeding with repairs or installation tasks. Even small splinters can pose hazards later on. |
By following these steps carefully, you’ll create a safe working environment while ensuring that your window frame is ready for subsequent repairs or replacement tasks without unnecessary delays or risks involved in handling broken glass improperly.
Preparing the Frame for New Glass Installation: A Comprehensive Guide
Properly preparing the frame is a critical step in ensuring a secure and lasting installation of new window glass. Skipping or rushing this part of the process can lead to improper sealing, drafts, or even structural damage to your window over time. Below is a detailed guide to help you prepare the frame effectively.
Step 1: Assess the Existing Frame
- Rot or decay on wooden frames: This is especially common in older windows exposed to moisture. Use a knife or screwdriver to probe for soft spots.
- Cracks or splits: Inspect for visible cracks that may compromise structural integrity.
- Corrosion on metal frames: Check for rust or pitting which could weaken its strength.
If damage is extensive, repairs may be necessary before proceeding with installation.
Step 2: Gather Necessary Tools
| Tools | Purpose |
| Utility knife | To cut away old putty or sealant |
| Putty knife | For scraping off debris from the frame |
| Screwdriver | To remove leftover screws or hardware |
| Sandpaper (medium/fine grit) | Smoothens out rough surfaces |
| Wire brush | Removes rust and dirt from metal frames |
In addition to tools, keep cleaning supplies such as rags, soapy water, and a vacuum nearby for cleaning debris.
Step 3: Remove Old Putty and Sealant
Using a utility knife or putty knife, carefully scrape away any remaining putty around the edges of the frame where the old glass was secured. Be thorough but gentle—excessive force could damage fragile sections of wooden frames. For stubborn areas, use a heat gun set at low temperature to soften hardened putty before removal.
Step 4: Clean Out Debris
- Use a brush or vacuum to clear out smaller particles within grooves.
- Wipe down with soapy water on wood frames (or an appropriate cleaner for metal) to eliminate dust and grime.
- Dry completely using lint-free cloths before moving forward.
Neglecting this step may compromise adhesion during later stages like applying glazing compounds.
Step 5: Address Damage if Necessary
- Fill them with wood filler.
- Allow ample drying time based on product instructions.
- Sand smooth with fine-grit sandpaper.
- Apply rust remover using steel wool.
- Afterward, consider priming exposed metallic surfaces with anti-corrosive paint.
This will prevent further deterioration while improving long-term stability.
Step 6: Test Frame Fit
- Measure all sides of your window opening using a tape measure.
- Compare these dimensions against your replacement glass pane—ensure it matches perfectly without gaps.
- Dry fit (place) the pane into position without securing it permanently yet; this checks compatibility between frame prep work and pane sizing.
By following these steps carefully when preparing your window frame for new glass installation, you’ll set yourself up for success while reducing potential future issues related to improper sealing or alignment during final assembly stages.
How to Properly Apply Putty and Secure the New Glass Pane
Applying putty and securing a new glass pane is a critical step in window installation or repair. Proper technique not only ensures a professional finish but also enhances the durability and energy efficiency of the window. Follow this guide for best practices.
Why Proper Putty Application Matters
Using putty correctly serves several purposes, such as: – Sealing Gaps: Ensures no air or moisture leaks through. – Securing the Glass: Keeps the pane firmly in place against environmental impacts. – Aesthetic Finishing: Provides a smooth, clean look around the glass.
Neglecting this step can lead to drafts, increased energy bills, and potential damage over time.
Tools and Materials You’ll Need
Before starting, gather these essential tools: – Glazier’s putty or glazing compound
– A high-quality putty knife (flexible blade recommended)
– Linseed oil (optional for softening old-fashioned putty)
– Clean rags or paper towels
– A utility knife (for trimming excess material)
Ensure your tools are clean and free of debris to avoid imperfections during application.
Step-by-Step Guide to Applying Putty
- Remove any old putty remnants with a scraper or utility knife.
- Ensure that no residue or dust remains, as this can prevent proper adhesion. Consider lightly sanding wood frames if they feel rough.
- Knead the putty by hand until it becomes pliable. For pre-mixed compounds, ensure an even consistency throughout.
- If using traditional linseed oil-based putty, warming it slightly in your hands can make handling easier.
- Roll small portions of putty into long strips about ¼ inch thick. These strips will act as the base layer around the frame’s rabbet groove (the recess where glass sits).
- Press rolled-out strips into place inside the rabbet groove evenly. Smooth them out with your fingers or a flat edge.
- Gently place your new pane onto the applied base layer of putty.
- Ensure that it is centered within the frame before applying pressure.
- Insert glazier points along all sides of wood frames for extra reinforcement before sealing with additional compound.
- Roll another set of thin strips and press them onto edges where glass meets frame.
- Use your putty knife at a 45° angle to smooth out visible edges while ensuring uniform thickness across sections.
- Inspect for lumps or excess compound sticking out from corners.
- Carefully trim away any unnecessary material using a sharp utility blade without scratching surfaces.
Tips for Perfect Results
Here are some tips for achieving professional-looking results: – Keep both hands slightly damp while kneading oil-based glazing compounds to prevent sticking. – Avoid overloading corners with extra material; flatten transitions smoothly instead. – Allow sufficient drying time as specified by manufacturers—typically 7–14 days for older compounds—before painting over exposed areas if required.
| Drying Time | Compound Type | Paintable After |
| Fast-dry | Latex-based | 48 hours |
| Traditional | Linseed oil-based | 7–14 days |
Proper application ensures not only functional windows but also enhances curb appeal by creating neat finishes around every panel replacement job you undertake professionally.
- Exploring the Advantages of Professional Installation for Windows Rockville, MD
- A Comprehensive Guide to Choosing New Construction or Replacement Windows in Rockville, MD
- Efficient Tips for Window Replacement Rockville, MD Homeowners Should Know
- What to Expect During a Window Installation in Rockville, MD
- Expert Tips for DIY Installation of Windows Rockville, MD Homeowners Will Love
- Preparing for Window Replacement Rockville, MD: Tips for a Smooth Installation Process
What to Expect During a Window Installation in Rockville, MD
Replacing your home’s windows can feel overwhelming if you’re unfamiliar with the process. Understanding what to expect during a window replacement helps eliminate uncertainty and ensures you’re fully prepared to make informed decisions. Below is an overview of what typically happens during a professional window replacement project, from initial planning to completion.
Comprehensive Window Repair Rockville, MD: Initial Consultation and Assessment
The first step in the window replacement process involves an in-home consultation with a contractor or installation expert. During this phase:
– Measurements Are Taken: Precise measurements of your current windows are collected to ensure proper sizing for replacement units.
– Inspection of Existing Windows: Contractors assess the condition of your current windows and frames to determine if repairs or structural adjustments are necessary.
– Material Selection: You’ll discuss material options for frames (vinyl, wood, aluminum, or composite), as well as glass types (e.g., energy-efficient double-pane or triple-pane glass).
– Cost Estimate: A detailed price estimate is provided based on the type of windows you select, labor costs, and any customizations required.
Preparing for Installation
Preparation is key to ensuring a smooth installation process. Before work begins:
– Clear furniture and decorations near the windows being replaced. This might include removing curtains, blinds, or fragile objects on nearby shelves.
– Make arrangements for pets or children to avoid potential hazards during installation day.
– Verify permits if local regulations require them for window replacement projects.
Some contractors may supply protective coverings for floors and furniture or recommend that homeowners do so before their arrival.
The Installation Process
- Workers carefully remove existing windows without damaging surrounding walls.
- If necessary, adjustments such as reframing may be made if damage or rot is discovered in the original structure.
- Installers clean debris around openings and ensure proper insulation materials are applied before placing new units.
- New windows are leveled and securely fastened into place with screws or nails.
- Proper seals and caulking are applied around edges to prevent air leaks.
- Hardware such as locks or handles is installed.
- Contractors check alignment, functionality (opening/closing), and insulation effectiveness before completing their work.
Wrap-Up & Post-Installation Care
Once all new windows are installed successfully:
– Contractors will clean their workspace by removing old materials and debris from your property.
– You’ll receive care instructions outlining how to maintain the longevity of your new windows (e.g., cleaning recommendations).
– Keep all warranty documentation provided by manufacturers or installers in case issues arise later.
Benefits of Replacement Windows Rockville, MD Homeowners Should Know
| Benefit | Explanation |
| Improved Energy Efficiency | Modern windows reduce heating/cooling costs significantly due to better insulation properties. |
| Increased Property Value | High-quality replacements enhance resale value. |
| Reduced Noise Pollution | Triple-pane glass reduces outside noise intrusion. |
| Enhanced Curb Appeal | Updated designs complement modern architectural styles. |
By understanding each stage involved—from initial consultation through post-installation care—you’ll be better equipped when planning any future window replacements for your home.
What to Expect During a Windows Rockville, MD Replacement Installation From Start to Finish
Replacing your home’s windows is a significant investment and an excellent way to improve energy efficiency, boost curb appeal, and increase the overall value of your property. Understanding what happens during the window replacement process can help you prepare and ensure everything goes smoothly. Here’s a detailed guide on what to expect from start to finish during a window replacement installation.
Initial Consultation and Assessment
- Inspection of Existing Windows: The contractor will inspect the current state of your windows, including their frames, size, and overall condition.
- Discussion of Goals: You’ll discuss your goals for the project—whether it’s improving insulation, changing the style, or addressing damage.
- Measurement and Estimate: Professionals will take precise measurements of your windows to ensure accurate sizing for replacements. An estimate for labor, materials, and any additional costs will also be provided.
Selecting the Best Window Glass Replacement Rockville, MD Has to Offer
- Vinyl: Affordable with good insulation.
- Wood: Aesthetic appeal but requires maintenance.
- Aluminum: Durable but less energy-efficient.
- Composite: Combines durability with efficiency.
- Double-pane or triple-pane glass for added insulation.
- Low-E coatings that reduce heat transfer.
- Tinted or tempered glass for privacy or safety.
- Style Choices: Common styles include casement windows, double-hung windows, bay windows, sliding windows, and picture windows.
Preparing Your Home
- Clear furniture near the windows being replaced.
- Remove curtains, blinds, or window treatments.
- Cover nearby items with protective sheets if needed.
- Ensure pets are secured in another room during installation.
The Installation Day
- Contractors carefully remove old windows without causing damage to surrounding structures.
- Any debris is cleaned up as part of their process.
- The team will check for rot or structural issues in existing frames.
- Repairs may be made if necessary before installing new units.
- New units are fitted into place securely using precision tools.
- Insulation foam is applied around edges where needed to seal gaps effectively.
- Trim work is completed around installed units.
- Caulking ensures no air leakage occurs along seams or joints.
- Post-installation Cleanup: Installers clean up all debris from removal/installation processes so no mess remains behind in living spaces.
Final Walkthrough & Inspection
- You’ll inspect each window alongside contractors ensuring proper fitment and functionality (e.g., opening/closing mechanisms).
How Long Does the Entire Window Replacement Process Take?
The timeline for a window replacement project can vary depending on several factors, such as the size of your home, the number of windows being replaced, and the type of windows you choose. Understanding the general duration of the process can help you plan accordingly and manage expectations.
Factors Influencing Window Replacement Timelines
- Number of Windows: Replacing a single window often takes less than an hour, while a larger-scale project involving multiple windows may require several days.
- Window Type: Standard-sized windows are quicker to install compared to custom or specialty designs like bay or casement windows.
- Installation Method: Full-frame replacements, which involve removing both the window and its frame, take more time than insert installations, where only the sash is replaced.
- Weather Conditions: Outdoor elements, such as rain or snow, may delay installation work if conditions are unsafe.
Typical Timeline for Window Replacement
| Phase | Estimated Timeframe |
| Initial Consultation | 1–2 hours |
| Product Selection & Order | 1–4 weeks (depending on availability) |
| Pre-Installation Prep | 1 day |
| Installation (per window) | 30 minutes – 1 hour |
| Post-Installation Cleanup | Same day |
For smaller projects with readily available materials, the entire process can be completed in a few days; large-scale projects with custom orders may take several weeks.
Step-by-Step Breakdown
- Initial Consultation and Measurement
A contractor visits your home to assess your current windows and take precise measurements. This ensures that new windows fit perfectly into existing openings. - Product Ordering
Once you’ve selected your preferred style and material (e.g., vinyl, wood), your contractor places an order for the new windows. Custom designs or specialty finishes may extend this phase. - Preparation for Installation
Before installation begins, contractors prepare your space by covering nearby furniture and floors to protect them from dust and debris. - The old window is carefully removed.
- The opening is inspected for damage (e.g., rot or mold) that must be repaired before proceeding.
- The new window is installed and secured using appropriate insulation techniques to ensure energy efficiency.
- Final Inspection & Cleanup
Once all windows are installed, contractors perform a quality check to confirm proper operation. Excess materials are removed, leaving your home clean.
Tips to Minimize Delays
- Place orders early if custom sizes or unique features are required.
- Work with experienced professionals who adhere to efficient workflows.
- Discuss potential weather challenges ahead of time with your contractor.
Having realistic expectations regarding timelines helps ensure a smoother experience throughout your window replacement journey while keeping disruptions minimal for you and your household.

How Long Does the Entire Window Replacement Process Take?
When planning a window replacement project, one of the most common questions homeowners ask is how long the entire process will take. The timeline can vary based on several factors, such as the size of your home, the number of windows being replaced, and any customizations. Below is a detailed breakdown to help you better understand what to expect.
Factors That Affect the Timeline
- Pre-Installation Preparation
Before installation begins, there are several preparatory steps that can impact timing: - Consultation and Measurements: The contractor will visit your home to assess your needs and take precise measurements. This phase typically takes 1–2 days but could vary depending on scheduling availability.
- Product Selection and Ordering: Once measurements are taken, you’ll select your preferred window style and material. For standard windows, ordering may take 1–3 weeks. Custom or specialty windows may require up to 6 weeks or longer for manufacturing.
- Number of Windows Being Replaced
The scope of your project plays a significant role in determining how long it will take: - Replacing 5–10 windows in a typical home often takes one day to complete installation.
- Larger projects involving 20+ windows or multi-story buildings may require 2–3 days.
- Type of Installation Method
Different methods of installation also affect timelines: - Full-Frame Replacement: This involves removing the entire window frame along with the sash and trim before installing new components. It is more time-intensive than insert installations and may add an extra day or two depending on the number of windows.
- Insert Window Installation: This process involves fitting new windows into existing frames and is generally faster, often completed in less than a day for smaller jobs.
- Weather Conditions
Bad weather such as rain or extreme cold can delay outdoor work during installation, extending overall timelines by a few days if rescheduling becomes necessary.
General Timeline Overview
| Step | Estimated Timeframe |
| Initial Consultation | 1–2 Days |
| Product Selection & Ordering | 1–6+ Weeks (depending on customization) |
| Pre-Installation Preparation Work | 1 Week |
| Installation Day(s) | 1–3 Days |
| Post-Installation Cleanup | Few Hours |
Tips for Reducing Delays
- Schedule consultations early so contractors can measure accurately without rushing.
- Choose standard-sized windows to minimize manufacturing delays if customization isn’t essential.
- Plan installations during predictable weather seasons if possible—spring and early fall are often ideal times.
- Communicate openly with your contractor about timelines so they can keep you informed about progress or potential issues.
Understanding how long a window replacement process takes enables homeowners to plan effectively while minimizing disruptions to daily life. By considering these factors, you can better prepare for each step in this home improvement journey while ensuring seamless results that enhance both functionality and aesthetics in your home.
Everything You Need to Know About Window Replacement for a Remodeling Project
Window replacement is a critical element in any home remodeling project, whether you’re improving energy efficiency, boosting curb appeal, or modernizing your living space. Understanding how window replacement fits into your remodeling goals is essential for ensuring the process goes smoothly and delivers the results you desire. Below, we’ll cover key aspects of window replacement during a remodel, including benefits, considerations, and tips for making informed decisions.
Benefits of Replacing Windows During a Remodeling Project
- Enhanced Energy Efficiency: Modern windows are designed with advanced technologies such as low-E glass coatings, double or triple-pane construction, and insulated frames that reduce heat transfer. This can significantly lower your heating and cooling costs.
- Improved Aesthetics: Replacing outdated windows with contemporary designs can instantly elevate the appearance of your home’s interior and exterior.
- Increased Home Value: High-quality windows can enhance resale value by appealing to potential buyers who prioritize energy-efficient homes with updated features.
- Better Functionality: Newer models often include features like easier-to-operate mechanisms or tilt-in sashes for cleaning convenience.
- Reduced Noise Pollution: Modern windows provide improved soundproofing to minimize external noise intrusion.
Key Considerations Before Starting
- Costs can vary based on materials (e.g., vinyl vs. wood), styles (e.g., casement vs. double-hung), and additional features (e.g., impact resistance or UV protection).
- Allocate 10–15% of your total remodeling budget for window replacements if they’re a significant component of the project.
- Select window styles that align with your overall design vision. For example: | Remodel Style | Recommended Window Type | |———————–|——————————–| | Modern/Contemporary | Large picture windows or sliders | | Traditional | Double-hung or bay windows | | Rustic/Farmhouse | Wood-framed casement windows |
- Look for ENERGY STAR® certified products that meet energy performance standards for your region.
- Check metrics such as U-factor (measures insulation) and solar heat gain coefficient (SHGC) when evaluating options.
- Ensure compliance with local building codes concerning egress requirements (for bedrooms) and wind-load ratings if applicable.
Steps to Incorporate Window Replacement into Your Remodeling Timeline
- Collaborate with contractors early in the design process to determine which existing windows need replacing.
- Finalize measurements and style choices before construction begins.
- Custom-made windows may take several weeks to manufacture; order them well in advance to prevent delays.
- Schedule installation once old components like siding or interior walls have been removed but before finishing steps like painting or trim work begin.
- Work with installers to verify proper alignment and weatherproof sealing around each frame after installation is complete.
Tips for Maximizing Your Investment
To get the most from your investment during a remodel:
– Focus on high-impact areas first, such as living rooms or kitchens where natural light is essential. – Consider adding customizations like frosted glass for privacy in bathrooms or grid patterns for decorative appeal. – Don’t overlook warranties—choose manufacturers offering robust coverage on glass breakage, seal failure, and workmanship defects.
By integrating thoughtful planning into your remodeling strategy, you’ll enjoy the long-term comfort and beauty that quality replacement windows provide while enhancing the overall value of your home renovation project.
Finding the Best Window Replacement Rockville, MD Contractor for Your Home
Selecting the right contractor for your window replacement project is one of the most critical steps to ensure a smooth and successful installation. A highly qualified contractor can make the process stress-free while ensuring the work is completed efficiently and to a high standard. Below is a guide to help you choose the best window replacement contractor for your home.
Research Potential Contractors
- Online Reviews: Check websites like Google, Yelp, or Angie’s List. Look for consistently positive feedback from past clients.
- Referrals: Ask friends, family, or neighbors if they have worked with any reliable window contractors.
- Professional Associations: Seek out contractors who are members of respected organizations such as the National Association of Home Builders (NAHB) or American Window & Door Institute (AWDI). Membership often indicates a commitment to professionalism.
Evaluate Credentials
- Licensing: Verify that they are licensed to operate in your state or region.
- Insurance: Confirm that they carry proper liability insurance and workers’ compensation coverage.
- Certifications: Look for manufacturers’ certifications that indicate expertise in installing specific types of windows.
Interview Multiple Contractors
- How many years of experience do you have with window installations?
- Can you provide references from previous clients?
- What warranties do you offer on labor and materials?
- How do you handle unexpected issues during installation?
Their answers will give you valuable insights into their experience, reliability, and approach to customer service.
Request Detailed Estimates
| Element | Description |
| Cost | Total cost broken down by labor, materials, permits, etc. |
| Timeline | Estimated start date and duration of the project |
| Scope of Work | Specific details about what will be done during installation |
| Payment Terms | Payment schedule (e.g., deposits vs final payment) |
Be cautious with estimates that seem unusually low—they may indicate subpar materials or hidden costs.
Assess Communication
Effective communication is key to any successful home improvement project. Pay attention to how responsive and transparent each contractor is during initial interactions. This includes their willingness to answer questions thoroughly and provide updates on timelines or processes.
Red Flags to Watch For
- Unwillingness to provide proof of licensing or insurance.
- Demanding full payment upfront.
- Pressuring you into making quick decisions without providing adequate information.
- Poor reviews or unresolved complaints from previous customers.
Finalize Your Decision
Once you’ve completed your research, compare all contractors based on their qualifications, pricing, professionalism, and customer feedback. Choose someone who offers the best balance between quality work and reasonable pricing while ensuring clear communication throughout the process.
By carefully evaluating potential contractors using these criteria, you’ll be well-equipped to choose a reliable professional who can deliver exceptional results for your window replacement needs.
- Exploring the Advantages of Professional Installation for Windows Rockville, MD
- A Comprehensive Guide to Choosing New Construction or Replacement Windows in Rockville, MD
- Efficient Tips for Window Replacement Rockville, MD Homeowners Should Know
- What to Expect During a Window Installation in Rockville, MD
- Expert Tips for DIY Installation of Windows Rockville, MD Homeowners Will Love
- Preparing for Window Replacement Rockville, MD: Tips for a Smooth Installation Process